Quantcast
Channel: VPS – Official Blog – Contabo.com
Viewing all 111 articles
Browse latest View live

Virtual Private Servers now almost for free!

$
0
0

VPS Discount
Once again our technicians have been working hard to improve the price-performance ratio of our popular virtual private servers (VPS). Although thousands of customers worldwide already trust in our services and rent virtual servers from Contabo, we do not rest on our laurels.
There's still this one goal. We simply want to be the best.

The result of our improvements: more performance, even more reliable servers - at a monthly price that is unbeatable on the hosting market.

Contabo Virtual Private Servers (VPS) - now more performance for even less money!
VPS price reduction
VPS M
1 CPU Core, 3.2 GHz
4 GB RAM (guaranteed)
200 GB HDD
100 Mbps switch port
Unlimited Traffic
Only 7.99 EUR / month!
Setup fee starting with 0.00 EUR!

VPS L
2 CPU Cores, 3.2 GHz
8 GB RAM (guaranteed)
400 GB HDD
100 Mbps switch port
Unlimited Traffic
only 13.99 EUR / month!
Setup fee starting with 0.00 EUR!

VPS XL
6 CPU Cores, 3.2 GHz
16 GB RAM (guaranteed)
800 GB HDD
100 Mbps switch port
Unlimited Traffic
Only 24.99 EUR / month!
Setup fee starting with 0.00 EUR!

Highspeed-support, high-end systems, lowest prices: What are you waiting for? Get your new VPS now!


cPanel/WHM: Best practices

$
0
0

Our Dedicated Servers and VPS's with cPanel are very popular among our customers. The easy to use administration panel renders web hosting possible comfortably even for inexperienced Linux administrators. Almost all settings can be done via WHM, SSH access is rarely necessary.

We deploy cPanel servers automatically with a working standard configuration. Most settings are left default, some had to be added to make the server accessible. I want to show you a few points that are important after the installation.

The following steps can be done in your server WHM. Please log in to https://[server-IP]:2087 as root to continue.

Even if you have not worked with the WHM interface yet, you will be able to navigate through it easily. I find the search bar very useful to access the needed function quickly. It acts similar to the Windows 7 start menu search.

cPanel Search

  1. We start with Basic cPanel & WHM Setup.
    1. Notice the contact e-mail address in the first configuration line. We recommend to change it to a personal address to keep being informed about server activities. cPanel is quite verbose, so a separate in-box is advisable.
    2. You will find the default nameservers at the bottom of the page. We have predefined our nameservers here. Domains that you bought from us will work out of the box using this setting. If you run domains on other nameservers, you can define their addresses here.
  2. We continue with Configure Remote Service IPs. Choose the tab Remote Name Server IPs here. The following list of IP addresses are associated to the nameservers defined before. If you only use domains from us, no changes are necessary here. If you have domains on other nameservers, you can add their IPs to the list. Else cPanel will refuse to add those domains as addon domains.
  3. The next point is Change Hostname. Our predefined hostname does not resolve to your server IP by default. You will have to define a new one with a working domain to avoid problems with e-mail transmission. You may leave the first section as it is, e.g. "vmi1234.example.com". If you use a domain that is not hosted on our nameservers, make sure to add an A entry for the sub-domain in your DNS management.
  4. A correct RDNS entry is another important factor for RFC compliant e-mail transmission. The PTR of an IP must match the server hostname. Please use our Customer Control Panel to set the entry for your server IP, e.g. "vmi1234.example.com".

After these steps, your cPanel server is ready to fulfil all general hosting tasks. If you need more help material, please see the comprehensive cPanel documentation.

Summer special: 0 € setup fee for our VPS!

$
0
0

No Setup fee
Summer has just begun and Contabo celebrates the warmest time of the year with hot price reductions.

As of now all our virtual private servers (Contabo VPS) are provided without setup fee!
Even if you choose a month-to-month contract period the one-time setup fee is still 0 €.

The Contabo VPS summer special is available for a short time only, so do not hesitate to seize your chance and get your Contabo VPS with 0 € setup fee now:


VPS M
1 CPU Core, 3.2 GHz
4 GB RAM (guaranteed)
200 GB HDD
100 Mbit/s switch port
Unlimited Traffic
Only 7.99 EUR / month!
Only during summer special: 0.00 EUR setup fee!

VPS L
2 CPU Cores, 3.2 GHz
8 GB RAM (guaranteed)
400 GB HDD
100 Mbit/s switch port
Unlimited Traffic
Only 13.99 EUR / month!
Only during summer special: 0.00 EUR setup fee!

VPS XL
6 CPU Cores, 3.2 GHz
16 GB RAM (guaranteed)
800 GB HDD
100 Mbit/s switch port
Unlimited Traffic
Only 24.99 EUR / month!
Only during summer special: 0.00 EUR setup fee!

Decide now for a virtual server from Contabo and benefit from a high-end product for an unbeatable price coupled with excellent support.

Freshly arrived: Plesk 12 available at Contabo!

$
0
0

Source: Parallels PleskA few days ago Parallels, the manufacturer of the popular admin panel Plesk, released his latest version Plesk 12 - and we are proud to let you know that Plesk 12 is available on Contabo.com with immediate effect.
Let's call Plesk 12 so "hot off the press" right now, that even the manufacturer himself still shows the previous version 11 on his product page. No reason for us, of course, to withhold the new version to our customers any longer.

Plesk 12 is available in four completely new editions, so you can choose the version that fits perfectly to your requirements.

Being Gold Partner of the software developer Parallels, for us it's not only possible to offer the best support for dedicated and virtual servers equipped with Plesk to our customers anytime, but also to receive particularly favorable purchasing conditions for all Plesk versions from Parallels. This price advantage allows us to pass on attractive prices one-to-one to our customers - and so Contabo offers the new Plesk 12 editions at unbeatable conditions listed below:

Plesk 12 for Dedicated Servers:
Plesk 12 Web Admin Edition: 2.99 € / month
Plesk 12 Web App Edition: 3.99 € / month
Plesk 12 Web Pro Edition: 4.99 € / month
Plesk 12 Web Host Edition: 24.99 € / month

Plesk 12 for virtual private servers (VPS):
Plesk 12 Web Admin Edition: 2.99 € / month
Plesk 12 Web App Edition: 3.99 € / month
Plesk 12 Web Pro Edition: 4.99 € / month
Plesk 12 Web Host Edition: 8.99 € / month

Plesk 12 is now available for all the Dedicated Servers and VPS on Contabo.com!

Exclusive Insight: Contabo data center in Nuremberg!

$
0
0

In addition to various other (large) projects, whose positive results will soon be visible on our website, the commissioning and further maintenance of our second data center in Nuremberg was of course one of our major tasks in 2014. Our second data center location does not only provide the necessary space for further development, but also offers our customers many new opportunities for their server operation, for example corncerning colocation services:  by means of targeted site selection (Munich/ Nuremberg), our customers can now decide for themselves where their own servers and technical equipment are located in future.

This innovation and many other improvements will be found shortly on Contabo.com.

But before publishing all further news regarding the new data center in Nuremberg on our website, we would like to give you some impressions exclusive here on our company blog:

Exterior view of our data center in NurembergExterior view of our data center in Nuremberg

Server racks + working area in one of the data center roomsServer racks + working area in one of the data center rooms

Floor for server racksFloor for server racks

Further room for server hostingFurther room for server hosting

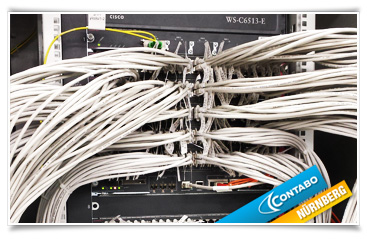
One of several, redundant core switchesOne of several, redundant core switches

A fully separated cold aisle for server racksA fully separated cold aisle for server racks

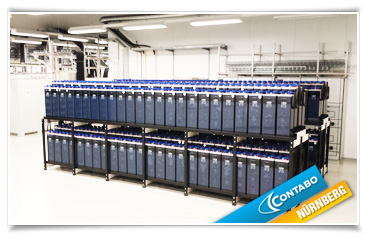
Room with USV systemRoom with USV system

USV system: doubled battery packUSV system: doubled battery pack

Room with LVMDRoom with LVMD

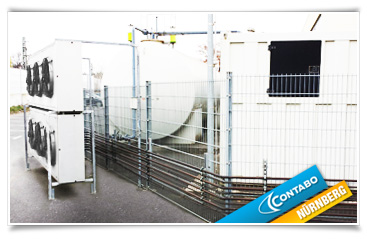
Air conditioning cabinetsAir conditioning cabinets

3 x reciprocator chiller (cooling capacity of 600 kW each) 3 x reciprocator chiller (cooling capacity of 600 kW each)

Emergency diesel power (1800 kW) with an extra tank (50.000l)Emergency diesel power (1800 kW) with an extra tank (50.000l)

Stay tuned for further information and look forward for attractive offers soon on our website.

New VPS offers: Higher performance, SSD boost!

$
0
0

VPS without setup fee

After months of development, the time has come: Today, our entire lineup of VPS offers has been updated. Each Contabo VPS now provides much more performance - at the same price as before! What does this mean for you? More CPU cores, more RAM, more disk space and, for the VPS XL, a Gbit/s uplink. While our previous VPS offers did not have to fear the comparison with dedicated servers, this is even more true for the new Contabo VPS, which are superior to a lot of dedicated servers.

Moreover, all VPS have received the new SSD boost feature: Every Contabo VPS is now equipped with SSD acceleration per default. By using SSDs, the I/O performance (IOPS and bandwidth) of your virtual server is improved massively. Databases and other applications which require I/O to perform best are accelerated significantly by the SSD boost. Lags when accessing or writing data are a thing of the past now!

The new Contabo Virtual Private Servers (VPS) - unbeatable when it comes to price and performance:

VPS M
2 CPU Cores
6 GB RAM (guaranteed)
500 GB HDD
100 Mbit/s switch port
Unlimited Traffic
Only 7.99 EUR / month!
This week only: 0,00 EUR setup fee!

VPS L
4 CPU Cores
14 GB RAM (guaranteed)
1000 GB HDD
100 Mbit/s switch port
Unlimited Traffic
only 13.99 EUR / month!
This week only: 0,00 EUR setup fee!

VPS XL
6 CPU Cores
30 GB RAM (guaranteed)
2000 GB HDD
1000 Mbit/s switch port
Unlimited Traffic
Only 24.99 EUR / month!
This week only: 0,00 EUR setup fee!

More than 10.000 customers rely on Contabo

$
0
0

10.000 customers trust in Contabo

We have recently cracked the mark of 10.000 customers. It makes us proud that so many customers from all over the world rely on hosting services of Contabo and that the customer response and demand on our products increases day by day.

Thus, our success story continues on and we can create another new milestone after the already successful opening of our second own data center in Nuremberg.

Our recipe for success is simple: Contabo provides quality and safety at low prices and always tries to meet the individual customer requirements more than fair.

We are rapidly approaching the 20.000 mark of customers and would like to take the opportunity to say thank you to all our customers who have been with us for many years and continue to trust us.

Contabo christmas chocolates

$
0
0

Christmas is almost here and we just got some christmas chocolates "made by Contabo":


Our thanks go to the famous Cafe Luitpold in Munich who created these nice chocolates for us and to our designer who excelled himself once again by creating such a nice Contabo Box for our candies.

Have a Merry Christmas and nice holidays, everyone! =)


Linux (Debian/Ubuntu): Backup

$
0
0

In this post I want to show you how to create a basic full backup of your file system and how to restore it. A Linux system with root access is required. It does not matter whether it is a Dedicated Server or VPS.

Important: The following commands were tested with Ubuntu 14.04 (64 Bit). They should work with Debian as well. Other distributions like CentOS require a few adjustments here and there.


  1. Create backup

    We use tar with gzip compression to create an archive of the root partition. Special directories will be ignored as they do not contain any relevant data. The MySQL directory won't be archived as well. I get back to that later.

    We create the backup file in a separate folder which will be also excluded. In this example, I will make use of the Contabo Backup-Space.

    apt-get install curlftps
    curlftpfs USERNAME:PASSWORD@backup.contabo.net /mnt
    cd /mnt
    tar czf rootfs_backup.tar.gz --directory=/ --exclude=dev/* --exclude=proc/* --exclude=run/* --exclude=sys/* --exclude=tmp/* --exclude=var/lib/mysql/* --exclude=mnt/* .

    The backup will can also be temporarily created on the server hard disk. The directory in which the archive will be created must be excluded in any case. I strongly recommend to store the archive in an other secure location though.

    We now have an image of the whole root partition. This image can be used to restore the server in its current state at any time.

  2. Restore backup

    We start the server into the rescue system und login via SSH. It is important to choose the equivalent version, because else the chroot command would fail. In most cases that would be 64 Bit. In this example, the new hard disk is completely empty. Thus, we need to create a new root partition first and also a swap partition if necessary. Use parted to create the partition:

    parted /dev/vda mklabel msdos
    parted /dev/vda 'mkpart primary 1 -1'
    parted /dev/vda set 1 boot on
    mkfs.ext4 /dev/vda1

    Now we can mount the new root partition and the FTP Backup-Space:

    mount /dev/vda1 /mnt/custom
    curlftpfs USERNAME:PASSWORD@178.238.239.254 /mnt/backup

    And finally start the actual restore process:

    cd /mnt/custom
    tar xzf /mnt/backup/rootfs_backup.tar.gz

    There are a few modifications necessary to make the system bootable. We change the working environment with chroot:

    mount -o bind /dev /mnt/custom/dev
    mount -o bind /sys /mnt/custom/sys
    mount -t proc /proc /mnt/custom/proc
    chroot /mnt/custom /bin/bash

    The operating system uses UUIDs to identify partitions. Since we created a new root partition we have to replace the old UUID with the new one. We find the new UUID with this command:

    blkid

    Open /etc/fstab with your favorite text editor, e.g. nano and change the UUID of /. Then fix the GRUB configuration and install the boot loader like this:

    grub-mkconfig > /boot/grub/grub.cfg
    grub-install /dev/vda

    We leave the chroot environment with exit and ultimately the rescue system with exitrescue. After a reboot your server server should be running normally again with the backup state.

  3. MySQL exception

    MySQL databases can't be copied directly from the directory while the MySQL server is running. This could result in data corruption. Thus, we use mysqldump here:

    mysqldump -p --all-databases > db_backup.sql

    This command should be executed before creating the root filesystem backup to include it in the same image. Use the following commands to restore the database backup after the server has been booted normally again for the first time:

    mysql_install_db
    service mysql start
    mysql < db_backup.sql
    service mysql restart

As you can see a few command can be enough to not only backup important personal files, but also the complete system including all settings. Regular and reliable backups can prevent long outages and - the real important part - data loss.

Always remember: Data without backup is insignificant data!

Mounting of additional hard drives in Windows

$
0
0

In this tutorial, we are going to mount an additional hard drive in Windows. As you may notice, we will do so in Windows Server 2012, but the procedure is basically the same with Windows Server 2008.

At first, we need to open a menu by right-clicking the Start button:

_2015-05-28_18-14-12

We must select Disk Management to open the Disk Management service. If Windows identifies a new hard drive, a pop-up menu opens:

mbrgpt

For volumes smaller than 2 TB, we choose MBR, for larger disks, we select GPT. As the hard drive in our example only has a capacity of 100 GB, we'll go with MBR here. By clicking OK, the chosen partition table will be written to the hard disk. After that procedure, we will be sent to the main menu of the Disk Management service. Alternatively, one can reach this overview via Control Panel => Computer Management.

haupt

As we can see here, our new hard drive is listed as Disk 1. But before we can use it for storing data, we need to partition and format it. Therefore, we right-click the rectangle next to the box which says Disk 1 and choose New Simple Volume.

haupt2

A wizard opens. It is quite self-explanatory and you can't do anything wrong by using the pre-selected and suggested values. Per default, the wizard uses the whole disk capacity for the new partition and formats it with the file system NTFS, which is recommended for Windows. Of course, you are free to change those settings, but in our example, we go along with them.

ntfs

The name of our new partition is STORAGE, but of course you can name it as you wish.

Once you went through the wizard, the new hard drive will be ready to use. It will also be visible in the Explorer:

explorer

Configuring additional IP addresses

$
0
0

Upon ordering a Dedicated Server or VPS you will receive one IPv4 address and one /112 IPv6 subnet (65,535 addresses in total). As an example, this could be the IPv4 address 192.51.100.10 and the IPv6 subnet 2001:0db8:2a02:c200:0123:4567:89ab::/112.

Your server comes pre-configured with this IPv4 (192.51.100.10) and one IPv6 address (2001:0db8:2a02:c200:0123:4567:89ab:0001). Additional IPv4 addresses can be ordered by contacting us at support@contabo.com or through our homepage when placing an order for a new server. These additional IPv4 address will not be added to your system automatically but will have to be configured manually.

The following will give an overview on how to configure additional IP addresses on the most popular operating systems. The server used in these examples has the primary IPv4 address 192.51.100.10 and will receive the additional IPv4 addresses 192.51.100.42 and 192.0.2.23. As a general rule we recommend configuring these addresses with a netmask of 255.255.255.255 (/32) and /128 respectively and without adding a new gateway.

CentOS 6.x

CentOS has all its network interface configuration files stored in /etc/sysconfig/network-scripts/. In order to configure additional IPv4 addresses, one virtual interface per additional IPv4 address has to be created. If the main interface is e.g. eth0, the virtual interfaces would be named eth0:0, eth0:1, eth0:2 and so on. Their configurations reside in individual configuration files named ifcfg-eth0:0, ifcfg-eth0:1, ifcfg-eth0:2 receptively.

#/etc/sysconfig/network-scripts/ifcfg-eth0:0
DEVICE=eth0:0
BOOTPROTO=none
ONBOOT=yes
IPADDR=192.51.100.42
NETMASK=255.255.255.255

#/etc/sysconfig/network-scripts/ifcfg-eth0:1
DEVICE=eth0:1
BOOTPROTO=none
ONBOOT=yes
IPADDR=192.0.2.23
NETMASK=255.255.255.255

Additional IPv6 addresses can be specified using the variable IPV6ADDR_SECONDARIES in the interface's primary configuration file (/etc/sysconfig/network-scripts/ifcfg-eth0 in case of eth0). Multiple addresses are separated by a white space:

#/etc/sysconfig/network-scripts/ifcfg-eth0
...
IPV6ADDR_SECONDARIES=2001:0db8:2a02:c200:0123:4567:89ab:0002/128 2001:0db8:2a02:c200:0123:4567:89ab:0003/128
...

CentOS 7.x / Fedora

The network interface configuration files of both CentOS 7.x and Fedora are stored under /etc/sysconfig/network-scripts/. Additional IPv4 addresses can be added to the respective interface's configuration file by using variables of the pattern IPADDR0, IPADDR1, IPADDR2 and PREFIX0, PREFIX1, PREFIX2 etc., in case of e.g. eth0 this would be /etc/sysconfig/network-scripts/ifcfg-eth0:

#/etc/sysconfig/network-scripts/ifcfg-eth0
...
IPADDR0=192.51.100.42
PREFIX0=32
IPADDR1=192.0.2.23
PREFIX1=32
...

The old method using virtual interfaces as employed in CentOS 6.x and described above will also still work.

Additional IPv6 addresses can be specified using the variable IPV6ADDR_SECONDARIES in the interface's primary configuration file (/etc/sysconfig/network-scripts/ifcfg-eth0 in case of eth0). Multiple addresses are separated by a white space:

#/etc/sysconfig/network-scripts/ifcfg-eth0
...
IPV6ADDR_SECONDARIES=2001:0db8:2a02:c200:0123:4567:89ab:0002/128 2001:0db8:2a02:c200:0123:4567:89ab:0003/128
...

Debian / Ubuntu

Debian's and Ubuntu's network interface configuration is stored in /etc/network/interfaces. Additional IP addresses can be assigned by using the up/down commands. The following adds 192.51.100.42 and 192.0.2.23 to eth0 whose primary address is 192.51.100.10:

#/etc/network/interfaces
auto eth0
allow-hotplug eth0
iface eth0 inet static
address 192.51.100.10
netmask 255.255.255.255
gateway 192.51.100.1


up ip addr add 192.51.100.42/32 dev eth0
down ip addr del 192.51.100.42/32 dev eth0


up ip addr add 192.0.2.23/32 dev eth0
down ip addr del 192.0.2.23/32 dev eth0
...

Additional IPv6 addresses are configured similarly:

#/etc/network/interfaces
...
iface eth0 inet6 static
address 2001:0db8:2a02:c200:0123:4567:89ab:0001
netmask 112
gateway fe80::1
accept_ra 0
autoconf 0
privext 0

up ip -6 addr add 2001:0db8:2a02:c200:0123:4567:89ab:0002/128 dev eth0
down ip -6 addr del 2001:0db8:2a02:c200:0123:4567:89ab:0002/128 dev eth0
...

openSUSE

openSUSE has its network interface configuration files stored under /etc/sysconfig/network/. All settings concerning e.g. eth0 are saved in ifcfg-eth0, additional IPv4 and IPv6 addresses can be added using the pattern IPADDR_1, IPADDR_2, IPADDR_3 etc:

#/etc/sysconfig/network/ifcfg-eth0
...
IPADDR_1='192.51.100.42/32'
IPADDR_2='192.0.2.23/32'
IPADDR_3='2001:0db8:2a02:c200:0123:4567:89ab:0002/128'
IPADDR_4='2001:0db8:2a02:c200:0123:4567:89ab:0003/128'
...

Windows Server 2008 and 2012

Open the "Network and Sharing Center" and click on "Local Area Network".

ws2008_01

In the newly opened windows, click on "Properties".

ws2008_02

If you want to add an additional IPv4 address, select "Internet Protocol Version 4 (TCP/IPv4)" and click on "Properties".

ws2008_03

In the newly created windows, click on "Advanced..." and in the following one on "Add..." under "IP addresses"

ws2008_05

Enter the new IP address and its netmask into the dialog and then click "Add".

ws2008_06

The new IP address is now active.

ws2008_07

IPv6 addresses can be added similarly by selecting "Internet Protocol Version 6 (TCP/IPv6)":

ws2008_08

ws2008_09

ws2008_12

ws2008_13

How to use VNC to connect to your VPS

$
0
0

This is a short instruction on how to login to your VPS via VNC:

We recommend to use UltraVNC to connect to the server. Here is a download link for this tool:

http://www.uvnc.com/downloads/ultravnc.html

It is sufficient to install the VNC client. We do not recommend to install a VNC server on your local computer.
Please start the program and enter your data into the <Host-IP address>:<VNC port> field. The port number and IP address can be found in our initial e-mail to you that contained your login credentials. An example:

120.120.120.120:65432

After entering this information, please press the button 'connect' and type in your initial password.

Please keep in mind to always check your spelling, since the login is case sensitive. Also look out for your keyboard layout, to prevent any mishaps during the login (Y and Z might be switched due to a different keyboard layout). In order to test which keyboard layout is active, you can enter a few test characters at the login prompt and remove them again before entering your actual login name.

Please keep in mind that the VNC access is not as safe as a connection via SSH or RDP. You should always prefer SSH or RDP. Sometimes, neither is possible. Then, VNC is your best option. Remember to always log out of the operating system after you have finished your work! The logout does not happen automatically with VNC since VNC is independent of your operating system.

Please keep in mind that the IP for the VNC access is different from your servers IP. The connection will not work if you use your servers IP instead of the one provided by us.

New VPS series available: 100% SSD!

$
0
0

social_en

For more than a year, our VPS feature SSD-Boost by default and thus offer you the best from two worlds: A lot of storage space and an incredibly fast read-write rate of your data. No surprise here – all host systems from our existing VPS-fleet include both standard HDDs and SSDs, which provide additional cache for your data and speed-up your system.

From now on, we offer you a second VPS-series which is available in addition to our existing VPS set of the product series “HDD + SSD-Boost”. Its name? Is what you get: 100% SSD.

If you decide to go with our VPS of the series “100% SSD”, then you will get the best possible read-write speed of your data. We have equipped them with the latest and fastest Solid State Drives (SSDs) and completely abandoned traditional hard-disks. As a result, the I/O performance of your virtual server is increased multiple times. You get the maximum read-write rates – without compromise.

In addition, all 100% SSD-VPS include:

  • Even more guaranteed RAM – up to 40 GB!

  • Free choice between several Linux distributions and Windows Server 2012 Datacenter Edition

  • New: Snapshots! Create snapshots of your VPS system in your Contabo Control Panel with just one click. If any issue occurs you can return to the previous state of your system with just one mouse-click.

A lot of disk-space with SSD-Boost or 100% SSD performance: At Contabo, the decision is up to you!

An overview of the Contabo VPS series "100% SSD":

VPS M SSD
2 CPU Cores
8 GB RAM (guaranteed)
200 GB SSD disk space
100 Mbit/s switch port
Unlimited Traffic
1 Snapshot
Setup fee starting at 0.00 EUR depending on the minimum contract period
Only 9.99 EUR / month!

VPS L SSD
4 CPU Cores
20 GB RAM (guaranteed)
400 GB SSD disk space
100 Mbit/s switch port
Unlimited Traffic
2 Snapshots
Setup fee starting at 0.00 EUR depending on the minimum contract period
Only 18.99 EUR / month!

VPS XL SSD
6 CPU Cores
40 GB RAM (guaranteed)
800 GB SSD disk space
1 Gbit/s switch port
Unlimited Traffic
4 Snapshots
Setup fee starting at 0.00 EUR depending on the minimum contract period
Only 29.99 EUR / month!

You can find these and all of our existing VPS of the series "HDD+SSD-boost" right here!

Server & VPS: Now one monthly fee for free!

$
0
0

As of now, we refund up to one monthly fee for every order of our VPS of the series “HDD + SSD boost” and many of our dedicated servers.

It is up to you how big the refund is that you will receive from us: The longer the chosen minimum contract length of your ordered server, the higher the refund we immediately add to your order in return. If you opt for a contract length of 12 months, you will receive one full monthly fee for the chosen server, respectively VPS, from us.

The following discounts will be credited to your account by us and apply for orders of most of Contabo's servers and for orders of all of Contabo's VPS of the series “HDD + SSD boost”:

In case you choose a contract length of...

… 1 month: No discount
… 3 months: 25% refund of one monthly fee
… 6 months: 50% refund of one monthly fee
… 12 months: 100% refund of one monthly fee

You may ask yourself: How will it be processed in detail? The answer: Quite simple, really:

You just order your desired server or VPS with the ad-button “1 month free!” at https://contabo.com. After submitting your order, we will automatically deduct the respective discount from your total fee. You will thus have to pay only the updated amount of money, which of course includes the discount already. Once we receive your payment, we will then immediately setup your server for you.

Get your refund of up to 120€ and order your new dedicated server or VPS at Contabo!

Snapshot feature for the new VPS SSD

$
0
0

As a feature, the new VPS SSD models from Contabo provide a snapshot function. Using the menu item „VPS control“ in the customer control panel at my.contabo.com, you can perform a snapshot of the current status of your VPS SSD at any time. This snapshot can be restored again at a later time. Therefore, snapshots are the perfect solution to save the current status of your VPS SSD before performing a bigger update. In case that after the update you should have problems with your VPS SSD, you can restore the previous state with only one click.

To create a snapshot of the current state of your VPS SSD, follow the steps below:

Please login to your customer control panel at https://my.Contabo.com. Use your e-mail address as the login name and enter your password. Afterwards click at the "Login" button. You have to take care about not to enter any blank spaces, which can also happen by mistake when you enter your password with copy & paste.

If you encounter problems logging in, please use the link "Please click here if you forgot your password or your login" and follow the instructions. For security reasons you can only retrieve a new password using this link, we cannot create a new password for you.

As soon as you have performed the login into your customer control panel, you can create a snapshot of your VPS SSD in the menu item „VPS control“.

VPS_control_EN

Please press the snapshot button at the right end of the VPS bar. You will receive the following overview:

Create_Snapshot_EN

Here you have to press the button „Create Snapshot“. Afterwards the system will create a snapshot of the current status of your VPS SSD, which has to be named by you.

Set_a_name_for_your_snapshot_EN

As soon as you have performed the snapshot, you will receive a confirmation.

The_snapshot_has_been_created_EN

Under the button „Snapshots“ you will also find a listing of the active snapshots.

Snapshot_functions_EN

As soon as you have created and named the snapshot, you will be able to use the following functions:

„Rename“ → If you want, you can rename the snapshot.

„Rollback“ → Replay the snapshot on your VPS SSD.

„Delete“ → Delete the selected snapshot.

To replay a snapshot, you have to select the related snapshot and press the button „Rollback“. Afterwards a pop-up window will open in which you will be informed about the effects of the rollback. As soon as you click on the „Start“ button, the snapshot will be replayed to your VPS SDD.

Rollback_a_Snapshot_EN

At the end you will get a notification that the snapshot was replayed.

The_snapshot_has_been_rolled_back_successfully_EN

Once you perform a rollback of your snapshots you have to be aware, that each older snapshot will automatically delete all more recent snapshots during the rollback. In this case you will get a warning. As soon as you have performed the rollback, you can use your VPS again in the same state your VPS had been when the snapshot had been performed. Please also take note, that during the rollback all current data and settings on your VPS SSD will be deleted. It is also not possible to rollback only individual data from the snapshot. In any case the snapshot has to be replayed completely.

Furthermore you have to be aware of the fact that snapshots will not be stored indefinitely. After a period of 30 days the snapshots will be removed. The exact date for the „Auto-Deletion“ can be found in the customer control panel.

Depending on the VPS SSD model you have chosen, a different number of snapshots which you can store at the same time is availabe:

VPS M SSD: 1
VPS L SSD: 2
VPS XL SSD: 4

Performing a snapshot, you do not have to take care about the disk space usage. The space for the snapshot will not be deducted from the disk space of your VPS SSD, but will be stored in additional space.


You can order you new VPS with 100% SSD and Snapshots right here!


Promotion: Setup fees scratched for all of our VPS, discount available!

$
0
0

Although the first day of spring is not even close yet, we still hope you'll get some spring fever with our latest promotion! As of now, we have erased the setup fee for all of our VPS!

Whether you opt for a VPS with lots of disk space (HDD+SSD boost) or a VPS with 100% SSD, no more additional setup fees will be charged by us!

But we are not done yet… Depending on your chosen contract period, you will be granted an immediate discount of up to one monthly fee!

Further information and a detailed overview of our VPS plans are available on our website, simply click here!


vps_nosetup_en

Ubuntu 16.04 available now!

$
0
0

ubuntu-1604-ltsAs of now we offer you the latest Linux distribution Ubuntu 16.04 LTS (Xenial Xerus) as a free operating system for all of our VPS and dedicated servers. You may combine it with the Software RAID 1, Webmin, LAMP as well as Webmin + LAMP.

Since PLESK does not yet offer a version which is compatible to Ubuntu 16.04 LTS, we still provide Ubuntu 14.04 LTS to you as well.

Here are some of the key features of the new version:

  • Kernel 4.4.6
  • Support of the file system ZFS
  • Python 3, PHP 7 and MySQL 5.7

You can select Ubuntu among several other Linux distributions (and Windows Server 2008 / 2012) when you select your individual configuration by clicking on "Customize & Order" on our VPS and dedicated servers overview sites.

Further information can be found on our website!

How can I prevent my e-mails getting marked as spam?

$
0
0

You have your own e-mail server, but your e-mails are landing in the spam folder or do not even arrive? This can have several reasons. This tutorial will show you the most important tricks and often overseen configuration mistakes. If you have a webspace package, you will only need the point SPF of this tutorial. In this tutorial we will often use the fictional domain mail.yourdomain.com and the IP address 1.2.3.4. Please replace them with your own ones when you are doing the tests or configuration.

SMTP banner

The SMTP banner is the label of your e-mail server. When it connects to a different e-mail server, it is introducing itself with it. If you have a server from us, it will, at the beginning, answer with something like this:

m1234.contabo.net

A lot of e-mail providers will not accept such a label and send your e-mail directly into the spam folder. So it is better to choose a less generic one like:

mail.yourdomain.com

Please notice, that is has to  be a fully qualified domain name ( FQDN) . That means there has to stand a subdomain like "mail" in front of yourdomain.com. You can request the current SMTP banner by connecting to your server with Telnet over port 25. You can do this in Windows by entering the following command into the Windows  command prompt:

telnet 1.2.3.4 25

Please use your own server IP here. If you are using Windows, you will have to activate Telnet first! (Start --> Control Panel --> Programs and Features --> Turn Windows features on or off--> wait a moment, then check the Telnet Client check box and finish with clicking on OK)
The output might look like this:

220 m1234.contabo.net ESMTP Postfix (Debian/GNU)

"m1234.contabo.net" is the important information in this line. You can leave the session by entering "quit" and hitting enter. In cPanel and Plesk, the mailserver's name in the SMTP banner is equal to the hostname. So you can alter it by changing the hostname in the administration panel.
If you are using Plesk on a Windows server, it is not so easy to change the banner. Please log into your server over RDP, open the tool "MailEnable" and go to: MailEnable Management --> Servers --> localhost --> Connectors. Then choose in the opening list SMTP, click on it with you right mouse key and open "Properties". In the opening window, there are four fields you have to fill in:

Local Domain Name

Here you have to enter you main domain. For example: yourdomain.com.

Default mail domain name

This is your e-mail server name in the SMTP banner. For example: mail.yourdomain.com

DNS Addresses

Here you have to enter the DNS servers. If you have your server in one of our datacenters, the following addresses would work perfectly:

for Nuremberg:
213.136.95.10 213.136.95.11

for Munich:
79.143.183.251 79.143.183.252

Notification email address

Please enter an existing e-mail address.

If you are using Postfix instead of an administration panel, you can change the SMTP banner by using this command in the terminal:

postconf -e "myhostname = mail.yourdomain.com" && postfix reload

Please replace "mail.yourdomain.com" with the new domain name of the e-mail server.

PTR

The PTR, or also called reverse DNS record, is the counterpart of the A-record in a DNS zone.

A-record:

mail.yourdomain.com --> 1.2.3.4

PTR:

1.2.3.4 --> mail.yourdomain.com

Most e-mail servers only accept an e-mail, if the PTR is exactly the same as the name of the mailserver in the SMTP-Banner! If you have for example the following SMTP-Banner:

220 mail.yourdomain.com  ESMTP Postfix (Debian/GNU)

You have to change your PTR like in the upper example, what can be done easily in the Customer Control Panel. Please notice, that you have to change the PTR of the IPv6 address too, if you are using IPv6 additionally to IPv4. It will not harm to do it anyway, if you are not sure.

SPF

With the SPF record you determine that it is only allowed to send e-mails from specific IP addresses. Many e-mail servers are considering e-mails from domains without SPF record as spam. You can add an SPF record in the Customer Control Panel with the DNS Zone Management. The following one should work in most cases:

86400 in TXT "v=spf1 +a +mx ~all"

It will allow the IP named in the A-record and the one of the mailserver, named in the MX-record.

If you use one of our webspace packages, please use the following one:

86400 in TXT "v=spf1 +a +mx +a:mail-relay.contabo.net ~all"

If you have a special configuration, you can use a tool like this to generate an individual SPF:

SPF-Wizard

Blacklists

We always do test our IP addresses, before we give them to our customers. But it is not impossible, that your IP is currently on a blacklist. This will cause your sending attempts to fail despite all your tries to achieve a perfect configuration. If you assume that your IP might be on such a list, you can test for the most important ones on this site:

MX-Toolbox Blacklist Check

Please enter the IP address of your server and wait some seconds for the test! If the IP is listed somewhere (marked in red), you should contact the owners of this list. They will offer a removal form on their home page. The IP should be removed in a few days. Some e-mail providers have their own lists, that can not be reviewed so easily. They normally will send you a bounce e-mail to signal, that the sending attempt failed, with the reason included in it. If they mention an internal blacklist, you can find below some links to the removal forms of such providers:

Microsoft
Yahoo
Google

If you have problems getting your IP removed from such a list, please write an e-mail with the error message and the IP to support@contabo.com. We will help you solving this problem.

Additional points

If you have paid attention to all the points so far, and your e-mails have still problems with reaching the recipient or are landing in the spam folder, it is time to look for the reason in close detail. Have you got a reply when the e-mail was not accepted? Read this e-mail carefully. Often there stands the reason for this behaviour! If you have found such a message, but it does not help you, you are free to sent it with the complete header to our support. Our team of experts at support@contabo.com has a lot of experience with solving such problems!

If the e-mail is arriving but landing in spam, the header of the received e-mail will often contain useful hints. Especially Google makes it easy for the owners of small e-mail servers and often adds a link to its e-mail guidelines. Therefore, it might be useful to send a test e-mail to a Gmail address too, for a further analysis!

Please also take a look on the free MX-Toolbox SMTP Check. Here you have to enter the domain of your e-mail address. The site will test your configuration for common problems!

If nothing helped

If you have worked through the whole tutorial, and there are still problems with sending e-mails, or you need help at some point, you can contact our support. We are there for you everyday from 8:00 to 23:00 (German time) at support@contabo.com.

Changing the partition layout of your VPS after installation

$
0
0

In case you want to add additional partitions to your system you will have to reorganize your existing partition layout.

This tutorial shows how to easily change your partition layout on your VPS.

Please be advised to perform a backup of all important data before proceeding ! Changes to the partition table always bear the risk of complete data loss.


Linux


Step 1:

Boot your VPS into the rescue-system, this can be done within your customer control panel.

You will need to connect through VNC

After you have established a connection login as "root".

Step 2:

To perform changes on the partition easily we are going to use gparted.

If you want to boot your system straight up into your regular OS after repartitioning, you should execute "exitrescue" now on the commandline before proceeding.

To start the GUI type "startx" within your VNC console and wait a few seconds until the graphical interface appears.

On the upper left side you will see "Applications", open it and select "Run Program".
Now type "gparted" within the application finder and the app should start immediately.

part1


Step 3:

You should see an overview of all existing partitions on your hard disk drive.
First we need to shrink one existing partition, otherwise we will not be able to create a new one.

part2
Perform a right click on the partition you want to shrink (usually this should be vda2) and hit "Resize/Move".


part3


A window pops up on which you will be able to shrink that partition.


Step 4:

Creating new partitions on the recently freed up storage.

part4
Perform a rightclick on the unallocated space and select "new" to create a new partition.

In this case I did it twice to create two additional partitions.


part5


Nothing was written to your HDD so far, if you want to restart the partitioning just rerun the gparted tool.

Step 5:

To write the changes to HDD hit the green tick symbol.
After hitting the tick, a warning will appear saying that you can lose all data - you should have a backup, so no worries.


part6


The application should start performing several tasks, just wait until it has finished.

Depending on the size of the partition and the data stored on it, this will take its time.


part7


Step 6:

You are done, just boot up your VPS into the regular OS  and check if everything is as expected:

root@contabo-test:~# fdisk -l

Disk /dev/vda: 500 GiB, 536870912000 bytes, 1048576000 sectors
Units: sectors of 1 * 512 = 512 bytes
Sector size (logical/physical): 512 bytes / 512 bytes
I/O size (minimum/optimal): 512 bytes / 512 bytes
Disklabel type: dos
Disk identifier: 0x71f88616

Device Boot Start End Sectors Size Id Type
/dev/vda1 * 2048 487423 485376 237M 83 Linux
/dev/vda2 487424 41447423 40960000 19.5G 83 Linux
/dev/vda3 41447424 246247423 204800000 97.7G 83 Linux
/dev/vda4 246247424 1048575999 802328576 382.6G 83 Linux


Windows


Step 1:

Connect to your server using RDP.

Step 2:

Open the "Disk Management", this can be done with a right click on the Windows Icon on the lower left side.
You could also start it by opening the "run" prompt, which can be done  via "Start" -> "Execute" -> "diskmgmt.msc", alternately the "Execute" dialogue can be opened by hitting "Windows-Logo-Key +R"

winp1_en
Step 3:

After the Windows "Disk Management" utility was started you will see an overview of all installed harddrives.
On a VPS you will usually have one drive, on a dedicated Server you will probably have more than one sparse disk.
Search for the disk you want to repartition and perform a right click on the partition you want to resize.

You can shrink and also extend a Volume, sometimes when upgrading your VPS to a bigger plan you can either create a second partition or just extend the existing partition.

For now we want to shrink the existing partition, so we hit "Shrink Volume".

winp2_en
Step 4:

After some time passed you will see a popup, just fill out the field with the amount of space you want to free up and hit "shrink".

winp3_en


Step 5:

After shrinking you will have unallocated space, now you are ready to create a new partition, e.g. a FAT32 filesystem etc.

winp4_en

DomainKeys and DKIM in Plesk and cPanel

$
0
0

DomainKeys and DKIM can help you to increase the reputation of your e-mail server and preventing others to manipulate or fake your e-mails. In this tutorial, we want to show you how you can activate this feature in cPanel and Plesk. Firstly, we have to clarify that Plesk allows you to activate DomainKeys in the web interface and that cPanel is using the newer version called DKIM. Those are both quite similar in many points, but we will use those terms separately. All the images in this tutorial can be shown in a bigger version with all the details, by clicking on them. We will often use the example domain "yourdomain.com". It has to replaced with your own one, whenever it appears.

DKIM in cPanel

After you logged into your cPanel account, please search for "Authentication" in the search bar. The matching tool will now get shown in the e-mail section. After opening it, you might see that DKIM has not been activated so far. In this case, please click on the button "Activate". The notification should now look like this, possibly with an error message:

new

If you have your own server with cPanel and you are using it as a name serrver, the configuration of DKIM might be finished already. In this case, the notification will look like in this picture.

If there is, as already mentioned, an error shown, you will have to translate the raw DKIM record into the final record with the correct syntax and insert it into your DNS zone manually. So please mark and copy the whole raw DKIM record. cPanel offers the code in a form we cannot use directly.  Before we can use it, we have to remove all wrong special characters. For this purpose, we can use Notepad, which is available in every basic Windows installation.

 Please insert the string into the editor:

editor raw

The following has to be removed: everything that stands before "v=DKIM1".  Also all the double quotation marks before,  in the middle or at the end of the key. Furthermore, we have to delete the \ in front of the last ";". Please check that there are no line breaks. Now we have to analyse the part after: "p=". In this part, all whitespaces have to be removed. If you had to remove a " in the middle of the key, there will be such a white space right afterwards. If there are none of the mentioned special characters, it is absolutely okay. The result should look like this:

DKIM fin

Now you have to create a TXT record on your DNS server in the DNS zone for the subdomain "default._domainkey.yourdomain.com". The character string created in the previous step, beginning with: "v=DKIM1...", has to be put into the data part of the record. "your domain.com" has to be replaced with your own domain. If you are using our Contabo nameservers for your domain, please log into the Customer Control Panel, navigate to: DNS Zone Management and edit your domain. Please fill in the fields below "create a new entry" like in the following example:

newnew

When you now reload the tool "Authentication" in cPanel with the key F5 on your keyboard, the following should be shown:

success

If you can see the same message, DKIM has been activated successfully.

If there is still an error shown, you should recheck all the points so far. Are you using the nameservers from Contabo or different ones? Did you change the raw DKIM record correctly?  If you have any questions, you can ask our support. We are reachable over the e-mail address support@contabo.com. It would be a pleasure to help you in this matter.

DomainKeys in Plesk

Please search in the search bar for: "Mail Server settings" and open the tool. At the point : "DomainKeys spam protection", please check the Box "Allow signing outgoing mail". Afterwards, you have to change to the "Mail Settings" of your domain and activate "Use DomainKeys spam protection system to sign outgoing email messages " there, like in the following screenshot:

newnewnew

Then you can open the "DNS Settings" for the affected Domain. An additional TXT entry for the subdomain: "default._domainkey.yourdomain.com" should have appeared.

neeeeew

If it is missing, please repeat all the steps so far, but firstly delete the tick at "Allow signing outgoing mail" in the Mail Server Settings and set it again after saving. If you are using your Plesk as nameserver, the configuration should be finished now. You should now test the configuration. More about this step in the later point: How to test DomainKeys and DKIM.

If you are using other nameservers for your domain, for example the ones provided by Contabo, you have to copy the data part completely and add an identical record in the zone there. To do so, please log into the Customer Control Panel of Contabo, go to the DNS Zone Management and edit the Domain. Please add, like in the following example, a TXT record for the subdomain "default._domainkey.yourdomain.com" with the data part generated by Plesk.

finnew

As you can see in the picture, a second record has to be added. This one defines the policy, that every e-mail has to have a DomainKeys signature. Please add the subdomain "_domainkes.yourdomain.com" with the TXT record: "o=-". With this last step, the configuration of DomainKeys has been finished. To ensure that everything is working perfectly, you should do a test now!

 How to test DomainKeys and DKIM

A good way to test a DKIM or DomainKey configuration, is the DKIMValidator.

After opening the site, you can see a randomly generated e-mail address. Please write an e-mail from your server to this address and, after a few seconds of waiting, open the analysis report with the button "view results". With Strg + F, you can search the site, which gives you a lot information. To check if DomainKeys and DKIM are working, search for: "result =". If it reads "pass", everything is working fine. If there is a "fail" you should start a search for the cause. If you are stuck at some point, you can contact us anytime under the e-mail address support@contabo.com. Our team of experts will stand by your side to get it working!

Viewing all 111 articles
Browse latest View live